Student Information System Integration
Configuration > Utilities > Student Information System Integrations
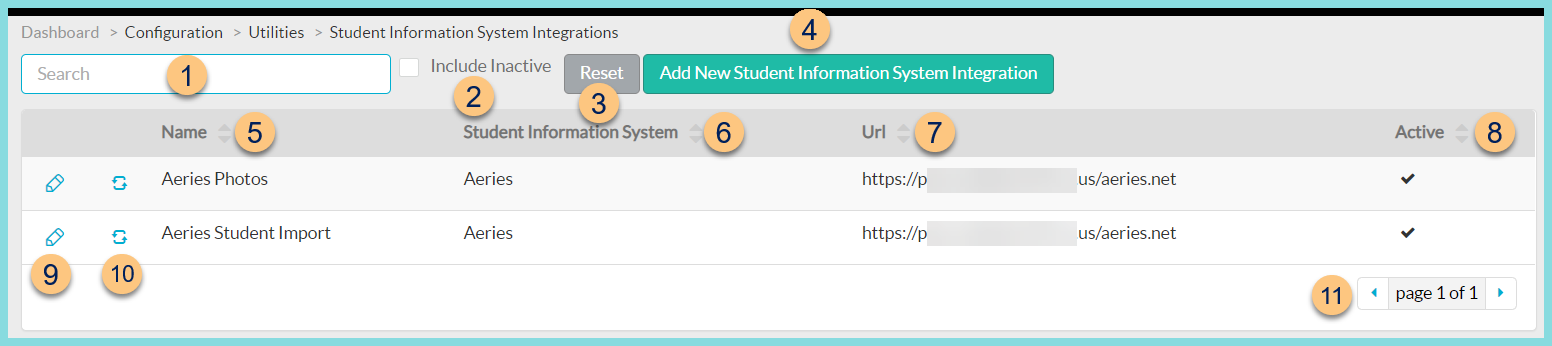
Student Information System Integrations are used to configure direct SIS integrations. Available with Aeries, Illuminate, PowerSchool, SchoolTool. After configuration of the integration, use the Job Scheduler to schedule updates.
-
Search - search by name
-
Include Inactive - check to include inactivated integrations
-
Reset - click to reset search parameters
-
Add New Student Information System Integration - click to add a new integration
-
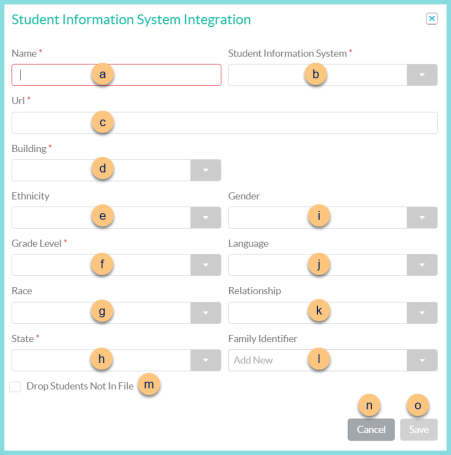
Name - enter a name for the integration
-
Student Information System - select student information system (Aeries, Illuminate, PowerSchool, PowerSchool Query, SchoolTool)
-
Url - enter integration URL Consumer Token, Consumer Secret (not pictured, Illuminate, PowerSchool only) - enter consumer token and secret provided by customer
Token (not pictured, Aeries only) - enter token provided by customer
User Token, User Secret (not pictured, Illuminate only) - enter user token and user secret provided by customer
Academic Year (not pictured, Aeries only) - enter data entity mapping for academic year -
Building - select data entity mapping for building
-
Ethnicity - select data entity mapping for ethnicity
-
Grade Level - select data entity mapping for grade level
-
Race - select data entity mapping for race
-
State - select data entity mapping for state
-
Gender - select data entity mapping for gender
-
Language - select data entity mapping for language
-
Relationship - select data entity mapping for relationship
-
Family Identifier - select fields that must match across different students to assign a matching family identifier (Family Key, Head of Household First Name, Head of Household Home Phone, Head of Household Last Name, Household Home Address)
Note: The Family Key option is only available for Aeries integrations.
Allergy (not pictured, PowerSchool Query only) - select select data entity mapping for allergies
Primary Enrollment Codes (not pictured, Aeries only) - enter primary enrollment codes provided by district
Alternate Enrollment Codes (not pictured, Aeries only) - enter alternate enrollment codes provided by district
Pictures Only (not pictured, Aeries only) - check to designate the integration as a photo integration (only Name, SIS, Url, Token, and Building are required)
Use Local ID as Pin (not pictured, Aeries only) - check to set POS ID to the local ID
Use Contact Record (not pictured, Aeries only) - check to allow the use of the Aeries contact record. -
Drop Students Not In File - check to end enrollment on any students not in the file. Not recommended if multiple student imports are configured for the district.
Active (not pictured, existing integrations only) - toggle active status -
Cancel - click to return to the previous screen without saving changes
-
Save - click to save changes
-
-
Name - click to sort by name
-
Student Information System - click to sort by student information system
-
Url - click to sort by url
-
Active - click to sort by active status
-
Pencil - click to edit an existing integration. See Step 4 for details.
-
Refresh icon - click to run an integration update manually
-
< > - click to scroll through pages